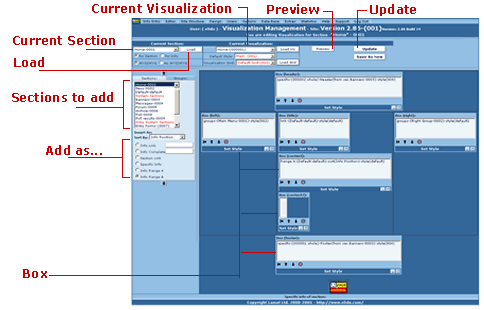
1. In Visualization Management choose the desired section from the list Section to add. 2. Choose the way you want to add it: - Info Link - adds all infos from the chosen section as info link; if you write a number, e.g. 3, in the corresponding field, then first 3 infos will be shown as info links; - Info Complete - adds all infos from the chosen section as info complete; setting the number of infos is also allowed; - Section Link - adds a link to the chosen section; - Specific Info - gives the opportunity to select exact info and show it. Usually used for banners. - Info Range A and Info Range B - used for advanced visualization; You can add infos from a section sorted by Info Position, Alphabetical, by Creation Date, by Publication Date, by Changed Date or Random. 3. After you have selected the way you want to add the section, select the desired box and click on the Add button. Use the Move Up and Move Down arrows to position the section. 4. With the added section still selected click on the Open Styles button, select the desired style and click on Set button. N.B. Changes will apply to all sections that use the Current Visualization!
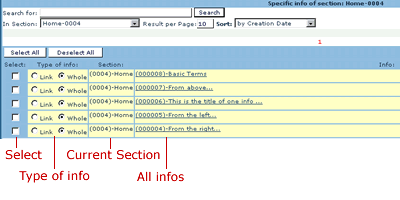
Click on specific and scroll down to the bottom of the window. A list of infos from the Current Section will be shown. You can perform search or sort infos to find the info you need. Select the type of the info - insert it as info link or as info complete and place a tick in the Select box.
You can use the Preview button in the upper end of Visualization Management panel. When you are pleased with the results use the Update button to save the changes you have made. A list of sections using this visualization will appear. Click OK to save the changes.